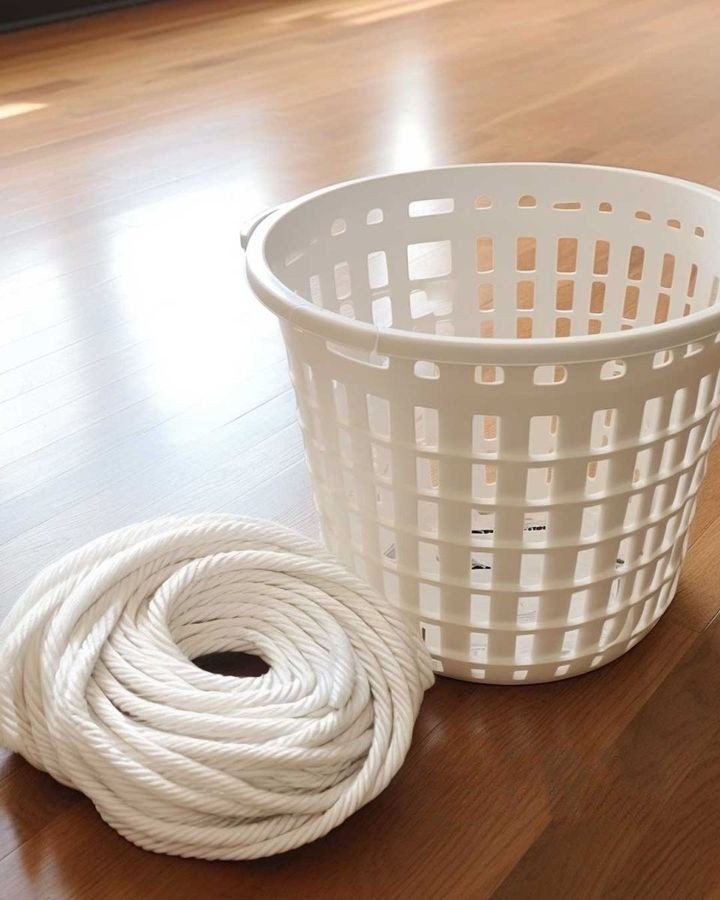
Step 4: Finish Off
When you reach the top:
Cut the yarn/twine cleanly.
Glue the end down securely.
Trim any loose ends with scissors.
Step 5: Optional Decorations
Add some personality by gluing on:
Ribbons
Mini ornaments
Faux holly, pine branches, or bells
You can also tie decorations directly onto the wrapped yarn for a more natural look.
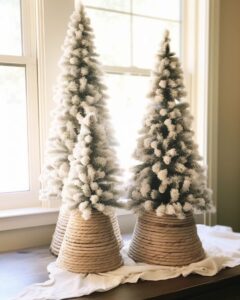
Step 6: Place Under the Tree
Turn the basket upside down and place it around the base of your Christmas tree.
Adjust as needed to center it. Voilà — your custom, rustic tree skirt is ready!

 Tips & Variations:
 Tips & Variations:
Go thick: The chunkier the yarn or twine, the more high-end and cozy it will look.
Mix textures: Try alternating between twine and yarn for a farmhouse-style twist.
Paint the basket first if you want a colored base to peek through.
Not just for tree skirts! Use this same method to create decorative storage baskets for blankets, toys, or gifts.
