Step-by-Step Instructions
1. Prepare the Bottle
Start with a clean plastic bottle. Wash it thoroughly inside and out to remove any dirt, residue, or odors. This ensures you’re not introducing more contaminants into your filtered water.
Cut the bottle in half. The top half will become the main filter body, and the bottom half will act as the container for your filtered water.
2. Create Filtration Holes
Use a soldering iron or heated metal rod to make three to five small holes in the bottle cap. These will allow filtered water to drip through. Make sure the holes are small enough to keep the filter layers in place but large enough to let water pass through slowly.
You can also add a few small holes along the sides of the bottle to help with air flow, which improves the filtration speed.
3. Build the Filtration Layers
The order and preparation of each layer is essential for an effective filter.
Bottom Layer – Cotton:
Place a layer of cotton directly above the cap holes. This works as the final guard, catching fine particles before water exits the filter. Press it down gently—firm enough to stay in place but loose enough to let water pass.
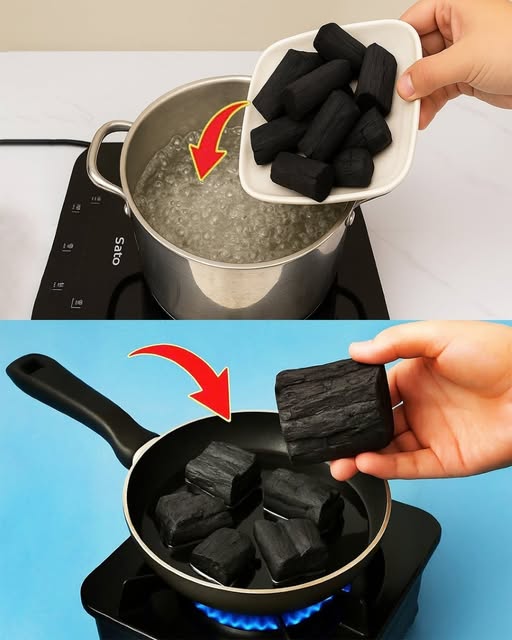
Second Layer – Charcoal:
Boil your charcoal beforehand to remove dust, impurities, and any harmful substances. Then crush it into small chunks—not powdery, but small enough to increase surface area. Charcoal absorbs impurities, odors, and chemicals from the water.
Third Layer – Clean Sand:
Add a layer of fine, clean sand. This traps smaller particles and helps water flow evenly through the filter.
Fourth Layer – Additional Charcoal:
Add another layer of charcoal to increase purification efficiency and provide an extra safety barrier.
Fifth Layer – Top Sand Layer:
Place another layer of clean sand on top. This prevents charcoal from shifting and acts as the first filter for finer debris.
Sixth Layer – Gravel or Small Pebbles:
Top everything with a layer of clean gravel. This blocks leaves, twigs, and larger debris from entering the filter, while helping to evenly distribute the water flow over the sand layer.
diy water filter bottle layers
4. Testing Your Filter
Place the top half of the bottle (now the filter) upside down into the bottom half or another clean container.
Pour dirty water slowly over the gravel layer and watch as it travels through each stage of filtration. The cotton at the bottom will catch the last bits of sediment before the water drips out into the container below.
While the filtered water may not look like commercial bottled water, it should be noticeably clearer and free from most visible debris.
